Second Step
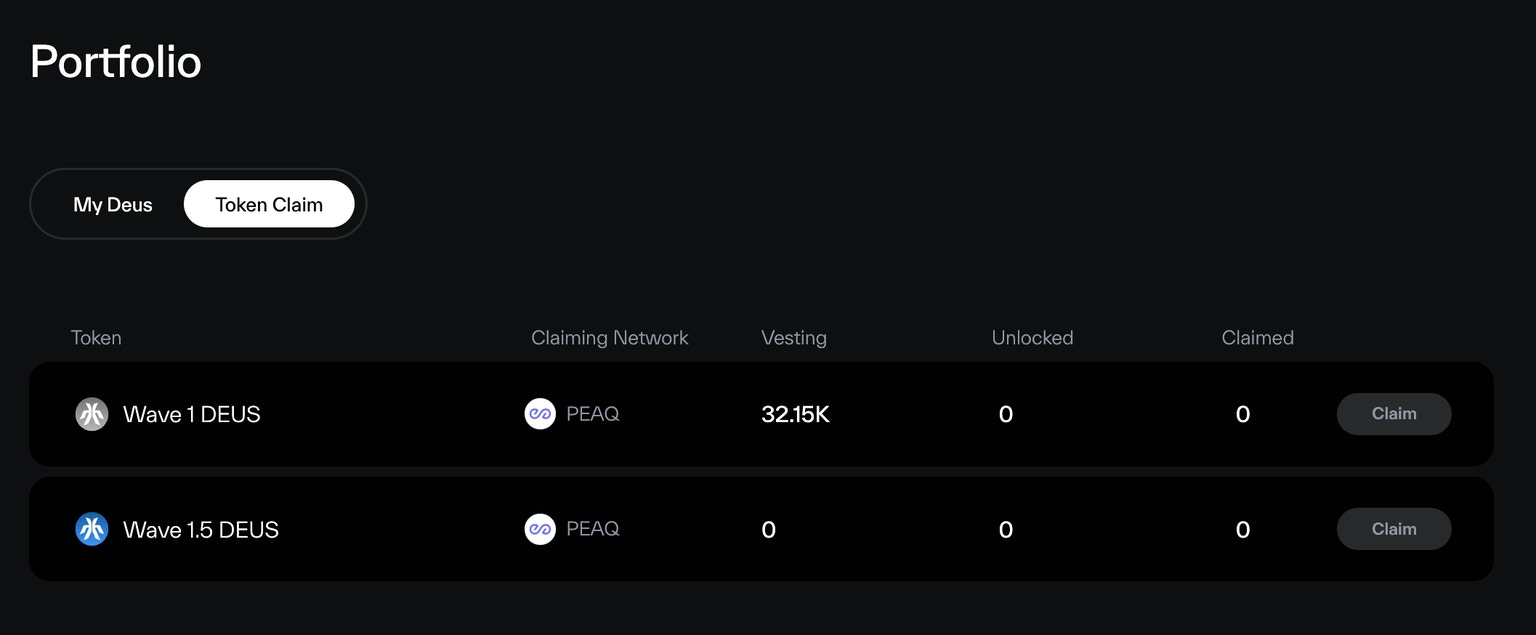
Swap your selected amount of tokens for DEUS receipt tokens. There will multiple waves that you will be able to participate in
Part 1. Getting Ready to Participate
1. Connect Your Wallet
The first step is to connect your metamask wallet. Start by clicking the connect button at the top right corner of the genesis auction website. Base is an Ethereum Layer 2 blockchain. Ensure eligible tokens are on the Base Network. The Genesis Auction portal only supports Metamask and Coinbase wallet.Setting up a Metamask Wallet
To add Base as a custom network to MetaMask:- Open the MetaMask browser extension.
- Open the network selection dropdown menu by clicking the dropdown button at the top of the extension.
- Click the Add network button.
- Click Add a network manually.
-
In the Add a network manually dialog that appears, enter the following information for Base mainnet:
To pick up a draggable item, press the space bar. While dragging, use the arrow keys to move the item. Press space again to drop the item in its new position, or press escape to cancel.
To pick up a draggable item, press the space bar. While dragging, use the arrow keys to move the item. Press space again to drop the item in its new position, or press escape to cancel.
Network Name Add comment Base Mainnet Add comment Description Add comment The public mainnet for Base. Add comment RPC Endpoint Add comment https://mainnet.base.org Add comment Chain ID Add comment 8453 Add comment Currency Symbol Add comment ETH Add comment Block Explorer Add comment https://base.blockscout.com/ Add comment - **Tap the Save button **to save Base as a network.
Setting up a Coinbase Wallet
The Coinbase Wallet browser extension provides support for Base by default. To use Base with Coinbase Wallet:- Open the Coinbase Wallet browser extension and log in to your account.
- Connect to an app using Coinbase Wallet.
- Open the network selection menu by clicking the network icon in the upper right-hand corner.
- Select Base.
2. Fund Your Wallet with ETH for Transaction Fees
You will need ETH to interact with the Base network. Every transaction on the Base network has a transaction fee that must be paid in ETH. This fee is referred to as a ‘gas’ fee. The Base network is cost-effective, so you won’t need much ETH tokens to pay for transactions.3. Fund Your Wallet with USDC
To participate in the auction, you will need Bid Tokens. Those are the tokens that are eligible and can be used to acquire DEUS receipt tokens. Wave 1.5 will use USDC tokens exclusively. Ensure you fund your wallet with the necessary USDC tokens to participate. More token options will be offered in subsequent waves.Part 2. Acquiring Receipt Tokens via Swap
1. Explore Auction Status and Live Info
On the Genesis Auction website (genesis.xmaquina.io), you can check the status of the latest auction right on the homepage. The auction will consist of multiple waves, with as many waves as needed to sell all the Genesis Auction allocated tokens. We expect the auction to conclude within 3 to 4 total waves. You can sign up to receive email notifications about the start of each auction wave. While each wave is expected to last about two to four weeks, high demand may cause a wave to close in a much shorter time period. For updates, you can also join our Discord, follow us on X and enable notifications to stay informed.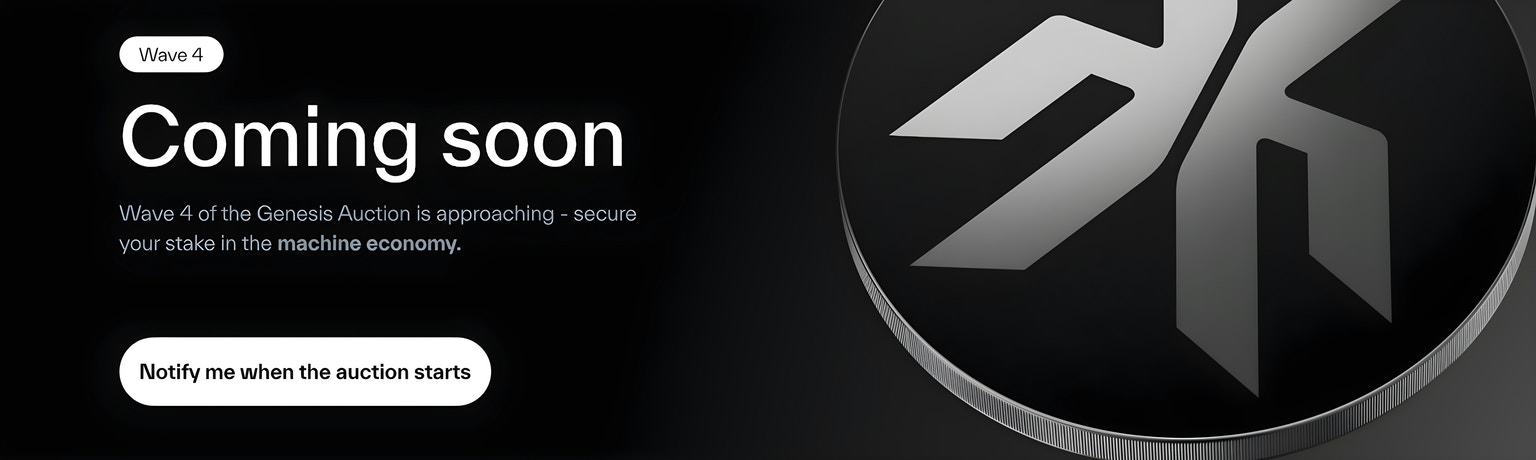
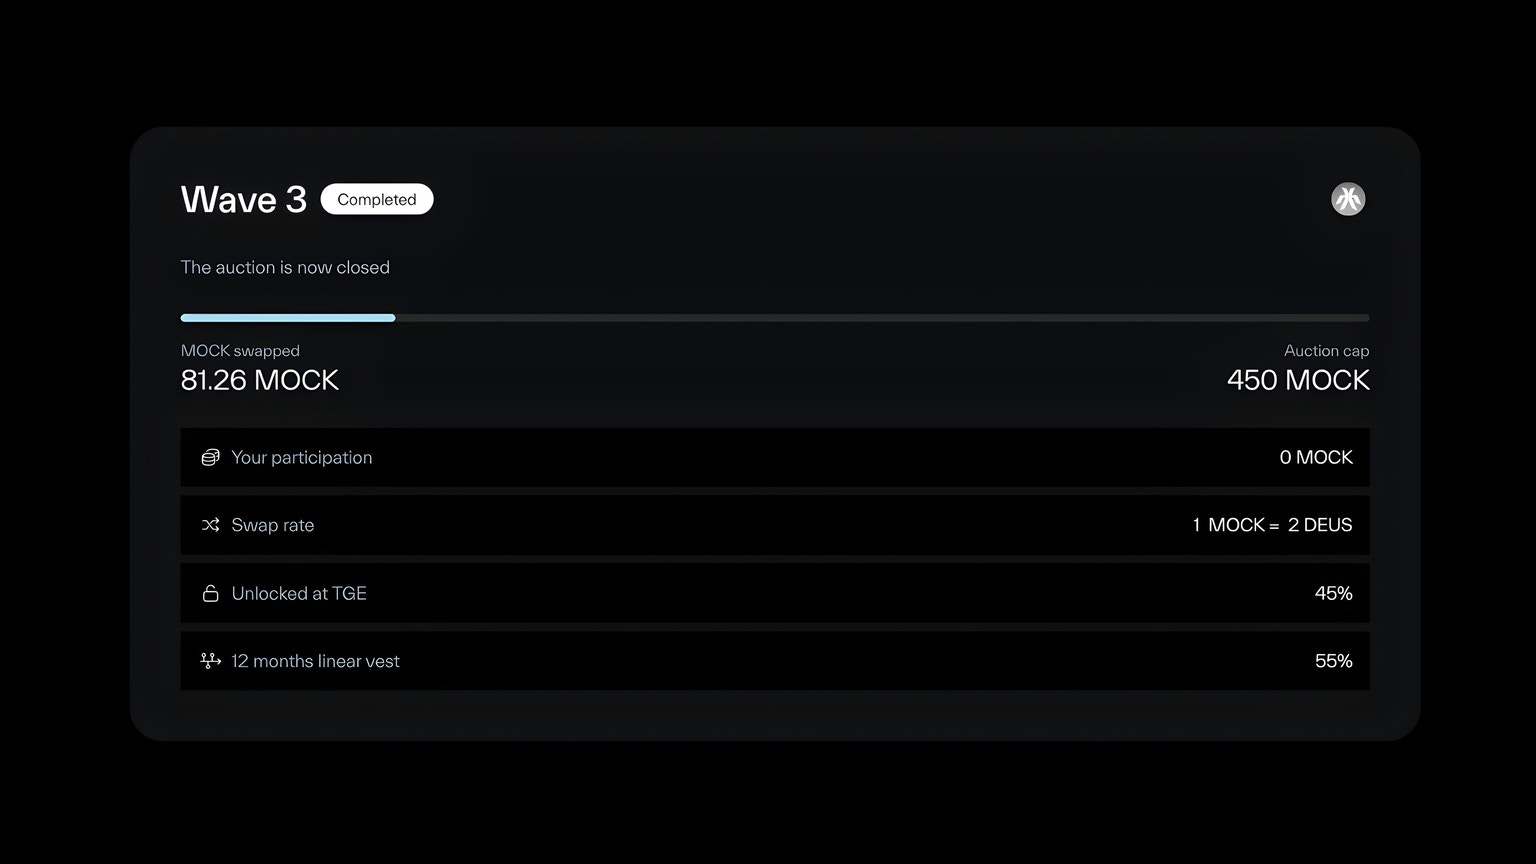
2. Wave Auction Information
Terms may vary with each wave:- Early Waves: Lower swap rates.
- Later Waves: Higher swap rates with potentially different unlock percentages at TGE, depending on demand and market conditions.
- Swap rate (per DEUS).
- Unlocked Supply at TGE.
3. Swap
Follow these steps to complete your swap:- Enter the Amount: Decide how much you want to swap and input the amount.
- Verify: Double-check that the amount is correct.
- Confirm with MetaMask: Approve the transaction in your MetaMask wallet.
- Sign the Transaction: Complete the process by signing in MetaMask.